
Posted by:
Category:
Comments:
Post Date:
How to Test a Fuse with a Multimeter: Step-by-Step Guide
Have your electronic appliances stopped working while you were in the middle of a task? It gets frustrating, right? Often, the culprit is just a simple fuse.
You might think that checking a fuse is straightforward, but it is not the case. It can also get confusing when you don’t know what you're doing and when you don’t have the right tools.
In this guide, we are going to walk you through a step-by-step guide on how to check a fuse with a multimeter. We will also discuss the different testing modes, namely resistance, continuity, and voltage, and learn to maintain electrical systems safely.
30 Seconds Summary
- A fuse is a small but critical device that protects electrical circuits from overheating or damage caused by overcurrent. When a fault occurs, the fuse wire melts and breaks the circuit.
- When testing a fuse, always remember to turn off the power supply to the circuit before working with the fuse. Use insulated tools to remove the fuse.
- During a continuity test, if the multimeter emits a beep, the fuse is intact, as there’s a complete path. No beep means the fuse is likely blown.
- A functional fuse will show low resistance (near zero ohms) during a resistance test, while a blown fuse will show infinite resistance or "OL" on the display.
- During a voltage test, a reading of zero volts usually indicates a blown fuse, as there’s no path for the current. A reading close to the expected voltage means that the fuse is working.
What Is a Fuse?
A fuse is a small but critical device that protects electrical circuits from overheating or damage caused by overcurrent. When a fault occurs, the fuse wire melts and breaks the circuit, preventing further damage. Fuses are commonly found in homes, vehicles, and appliances, and they come in several types, such as cartridge fuses and automotive fuses.
If a fuse stops working, it compromises the safety of the circuit and the connected devices. That is why it is necessary to test the fuse regularly to ensure it is working properly.
How to Tell If a Fuse Is Blown?
So, how can you tell if a fuse is blown? Well, here are a few simple steps and signs that might help:
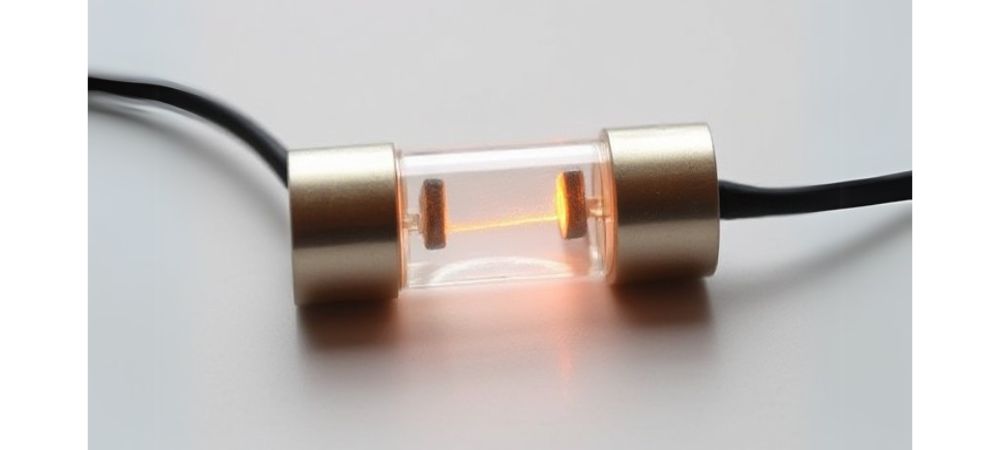
- There would be a visible break in the fuse wire
- There would be some discoloration, such as blackening or cloudiness inside the fuse
- Your appliances and circuits might not be working as expected
In some cases, you may not see any visible signs of damage. This is when a digital multimeter becomes absolutely necessary for an accurate diagnosis.
Let’s have a detailed look at how to test a fuse with a multimeter.
How to Test a Fuse with a Multimeter
Setting up
Before you start testing your fuse, you need to make sure that the multimeter is correctly set up so as to prevent any kind of damage to the device and a personal injury as well.
- Always remember to turn off the power supply to the circuit before working with the fuse. Use insulated tools to remove the fuse.
- Set up your workspace on a non-conductive surface, such as wood or plastic. Always wear safety gear like insulated gloves and safety goggles.
- Adjust the multimeter's dial to the continuity setting. This is usually indicated by a diode symbol or "CONT." This is an ideal mode for testing, as it checks for a complete path.
Visit Go Switchgear to shop for insulation tools and other safety equipment.
Continuity Test
Here is how to test the fuse for continuity:
- Remove the fuse: Always take the fuse out of its holder to avoid any interference that could result in an inaccurate reading.
- Place the probes: Hold the multimeter probes on each end of the fuse, making sure that either probe can touch either end.
- Listen for the beep: If the multimeter emits a beep, it means the fuse is intact, as there’s a complete path. No beep means the fuse is likely blown.
- Inspect the display: Many multimeters will show a value on the display. A high resistance value or "OL" indicates a blown fuse.
This simple test can tell you if a fuse is working or needs replacement.
Resistance Test
Here is how you can test the fuse with a multimeter for resistance
- Make sure that the circuit is powered off: Disconnect the fuse from any active power source.
- Set the multimeter: Switch your multimeter to measure resistance (Ω symbol).
- Place the probes: Attach one probe to each end of the fuse, making sure there is solid contact with the metal terminals.
- Read the resistance: A functional fuse will show low resistance (near zero ohms), while a blown fuse will show infinite resistance or "OL" on the display.
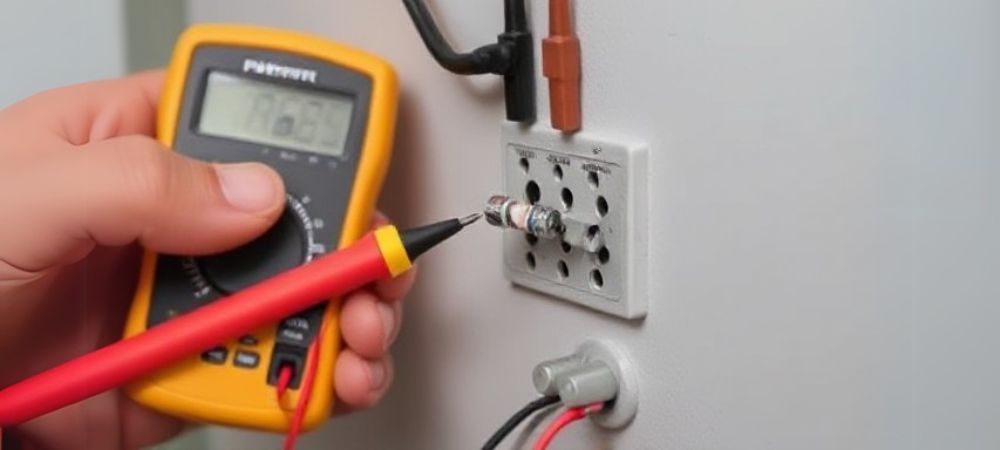
Voltage Test
Here is how you can check the fuse with a multimeter for voltage:
- Check safety: Make sure that the circuit can safely be powered on for testing.
- Set the multimeter: Adjust your multimeter to measure voltage. Start with the highest setting and adjust downward as needed.
- Test the fuse holder: Insert the probes into the fuse holder terminals; do not touch the metal parts directly.
- Check the reading: A reading of zero volts usually indicates a blown fuse, as there’s no path for the current. A reading close to the expected voltage means that the fuse is working.
These steps will accurately tell you if the fuse needs replacement or is working properly.
Check out the wide selection of high-quality fuse and fuse holders at Go Switchgear to make sure your electrical systems stay safe and efficient.
How to Understand the Results
Now that you know how to check a fuse with a multi-meter, it is important to understand how to understand the results. Here is a simple guide to help you:
- Continuity Test:
- Beep: A beep indicates that the fuse is working properly and does not need replacement.
- No beep: If the fuse is blown, you won’t hear a beep.
- Voltage Test (Across the Fuse Holder):
- Voltage present: If voltage is present, the circuit is live, and the fuse is functioning.
- No voltage: No voltage indicates that the fuse may be blown.
- Resistance Test:
- Low resistance (near 0 ohms): The fuse is good.
- Infinite resistance or "OL": The fuse is blown.
Quick Reference Table
By following the steps mentioned above and understanding the results, you will precisely know if your fuse is functional or needs to be replaced.
| Test | Reading | Interpretation |
| Continuity | Beep / Low Resistance | The fuse is good; no replacement is needed |
| Continuity | No Beep / Infinite Resistance | The fuse is blown; replace it |
| Voltage | Voltage Present | The circuit is live, and the fuse is good |
| Voltage | No Voltage | The fuse is likely blown |
| Resistance | Low Resistance | The fuse is good |
| Resistance | Infinite Resistance | The fuse is blown |
Safety Tips for Working with Fuses
Whenever you are handling electrical equipment or components, there are a few safety measures that you should take:
- Turn off the power: Always make sure that the power is fully turned off before you start testing or replacing a fuse.
- Double-check that the power is off: Use a voltage tester or multimeter to confirm that no power is flowing through the circuit. Never assume it's safe just because the switch is off.
- Use insulated tools: Always work with tools that have insulated handles.
- Wear protective gear: To minimize the risk of electric shock or other injuries, wear proper personal protective equipment (PPE), such as rubber gloves, rubber-soled shoes, and safety glasses.
- Choose the correct fuse: Always replace a blown fuse with one that matches the exact type and rating. Using a fuse with a higher rating can cause overheating and may lead to fires.
- Avoid touching metal parts: When working with fuses, never touch metal terminals or parts with your bare hands.
- Work in a safe environment: Make sure the work area is dry and free from water or moisture, as it can cause electrical hazards. Always keep the area tidy and free of unnecessary wires or tools.
- Follow manufacturer guidelines: Remember to consult the equipment’s manual for any specific safety instructions or procedures related to fuse replacement.
Risky Practices and How to Avoid Them
- Bypassing fuses: Never replace a blown fuse with a wire or another conductor as a quick fix. This can lead to serious damage and increase the risk of fire or injury.
- Ignoring recurring issues: If a fuse keeps blowing or you notice other signs of electrical problems, like flickering lights or strange noises, you need to consult with a professional. Such signs can be an indication of deeper electrical issues that need attention.
By adhering to these safety measures and avoiding common mistakes, you can safely replace fuses while keeping yourself safe and your electrical system maintained
Over to You
Testing a fuse with a multimeter is a simple yet essential task for maintaining electrical safety. By following the steps and the safety measures in this guide, you can easily recognize and replace blown fuses.
Need tools or replacement parts? Visit our electrical parts store, GoSwitchgear, for the best quality products.
FAQs
Q: How do I test a fuse without a multimeter?
A: You can inspect it visually for breaks or discoloration.
Q: Can I test a live fuse?
A: Yes, but only with proper precautions. Use the voltage mode on your multimeter and make sure you’re wearing insulated gloves.
Share this post
Related
Posts

A Guide to Choosing AC to DC Converters for UAE & GCC Electrical Systems
Master AC to DC converters with this comprehensive guide for engineers in the UAE & GCC. Learn selection, installation, and...

A Guide to Drill Machine Prices in the UAE for Technical Professionals
Find the best drill machine price in UAE. Our 2026 guide helps contractors and engineers choose the right corded, cordless,...

A Professional’s Guide to Choosing AGM VRLA Batteries in the UAE Climate
Discover why AGM VRLA batteries are the superior power solution for UPS, solar, and industrial systems in the UAE. Get...

How to Choose the Right Lithium Ion Battery Charger for UAE & GCC Projects
Discover how to select the right lithium ion battery charger for UAE projects. This guide covers specs, BMS integration, and...